Heel Pain Treatment
Just follow along with the videos below.
The Heel Pain Treatment Videos are below on this page. Go directly to any video by clicking these links: Intro, Video 1, Video 2, Video 3 .
Pain Relief Success Story, From Ti :
"I started to experience discomfort in my left heel 2 weeks ago and it has become painful enough that I had to take some ibuprofen and do the icing regiment. I saw your website yesterday and did my calf stretching exercise 3 times thus far. I just want to tell you that my pain has subsided significantly. The results are truly amazing. Thank you for your website and teaching." Ti, United States
You can do it too!
Click directly to any pain relief video on this page:
Intro, Video 1, Video 2, Video 3 .
*Please Watch This Short Video First. Thanks.
Please visit the techniques page now, if you haven't already. The techniques are extremely simple, but being familiar with them will vastly improve the effectiveness of what we do below.
On the homepage I describe…in detail…the 3 Simple Steps and the 4 Basic Facts about your body that make it possible for you to provide your own joint pain relief. It's good to know why what you're about to do actually works, but it's not required, so I'll leave that decision to you. There's a 95% chance that you......like thousands upon thousands of others.....can provide your own heel pain relief, so let's get to it.
Detailed Instructions For
Your Heel Pain Treatment
Click directly to any pain relief video on this page:
Intro,
Video 1,
Video 2,
Video 3 .
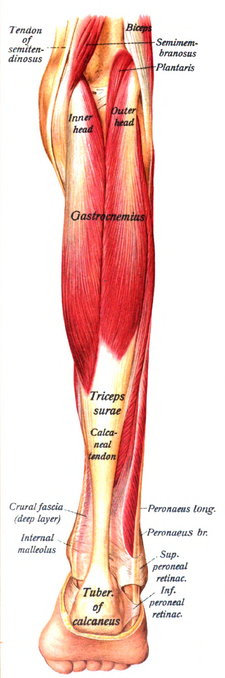
Tight calf muscles can pull on your heel and cause heel pain, so we must make sure they aren't too tight. This one stretch alone can be an effective heel pain treatment, but please go slowly with this stretch.
Here's what we're going to do:
A. Calf Stretch (do this stretch slowly) -

Stand up nice and straight. Rest the ball of your foot on the edge of the stair, and very gently, let your heel begin go hang lower and lower below the level of the stair you are standing on. Do this while KEEPING YOUR CALF MUSCLE ENGAGED.
And while still KEEPING YOUR CALF MUSCLE ENGAGED, raise and lower your heel SLOWLY as you feel your calf being stretched.
You can slowly increase the amount of bodyweight you put into to stretch, but always keep your calf muscle engaged just a bit, even when you are stretching the calf on the downward portion of the stretch.
Notice how much heel pain relief this one technique provides for future reference.
Would you include it in your unique heel pain treatment in the future?
Click directly to any pain relief video on this page:
Intro,
Video 1,
Video 2,
Video 3 .
Do not underestimate the power of the stretches presented here in Step 2. If I could only give you one thing to give you as a heel pain treatment, I would choose these stretches because they make sure the nerves that innervate your heel are free where they originate from.
Just one of these stretches may end up being your unique heel pain treatment, so take the time to do them all.
Here's what we're going to do:
A. Passive Low Back Stretch -
This will be in the video I'll be making, but until then……
Stack up some towels, or couch cushions, or anything else you have that you can build a platform about 6 inches high for your lower back to hang off of.
Lay on the platform with a pillow for your head and your buttocks touching the floor as you hang your lower back over the edge of the platform.
Place the soles of your feet together and stuff some folded pillows under both thighs to support the weight of your legs.
Make sure you are comfortable and stay in this position for 5 to 10 minutes.
Turn on your side with your knees together when you want to come out of this pose. And come out slowly. No rush.
How much did doing this heel pain treatment help your pain?
B. Reclined Hip Stretch -
The key to this stretch is to shoot your arm over your shin as far as you can over your shin, so that when you reach through your legs and grab it with your other hand you have maximized the leverage you have over your gluts.
It's a great stretch. Feel free alternate from one side to the other with each repetition. It will be easier on your arms and will actually help the hips release more rapidly in my experience.
Would you include it in your unique heel pain treatment in the future?
C. Seated Hip Stretch -
Ideally, you should feel this stretch in your buttocks or your front groin and hamstring.
If you feel this stretch in your knee, STOP. Then move your foot closer or further from your body and try again. DO NOT do this stretch until you find a position where you no longer feel the stretch in your knee joint.
As with the stretch above, feel free to go back and forth between stretching your right hip and then your left hip when doing this stretch.
Would you include it in your unique heel pain treatment in the future?
D. Hamstring Stretch -
Just like in the video, legs straight, quads flexed, weight in the balls of your feet.
If you want an entire video series just on hamstring stretches, go here: Best Hamstring Stretches (click here)
Would you include it in your unique heel pain treatment in the future?
Click directly to any pain relief video on this page:
Intro,
Video 1,
Video 2,
Video 3 .
We'll be targeting the muscles and tissue on the bottom of your foot that attach to your heel bone.
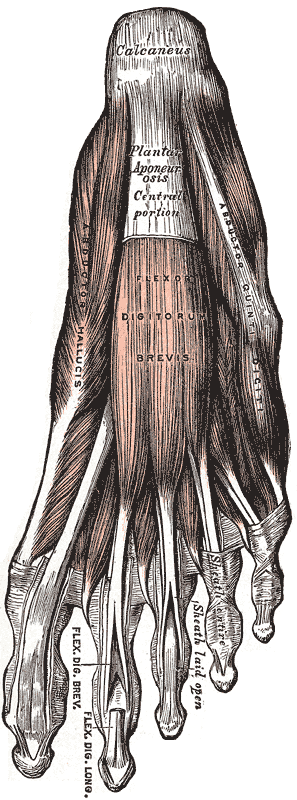
A. Bottom of Foot Release -
In a sitting position, cross your leg so that your ankle is resting on your knee.
Push your two thumbs into the tissue on the bottom of your foot and find any tissue that is painful, tender and tight when you press on it.
Do the press-pull-release technique on each tender spot.
Also use the press-hold-move technique on the tender spots, especially the more stubborn ones.
When your thumbs to rest, take a break.
Would you include this bottom or your foot work in your unique heel pain treatment in the future?
Self-Assessment Of
Your Heel Pain Treatment
Which techniques gave you the most heel pain relief?
Did Step 1, Step 2, or Step 3 work best?
Was there one specific heel pain treatment that instantly relieved your heel pain?
Remember what worked best for you, so you can do that first next time you need it.
Are you still experiencing some heel pain?
Which muscles are still tender (that means they are too tight!) and could use some more work?
Go back and repeat those techniques that seem to need a few more rounds. You may be pleasantly surprised at the results you get now that you've released other muscles that may prevented them letting go on the first attempt.
Investigate a bit and you'll eventually find which techniques make up your ultimate heel pain treatment. Then you'll be able to fix yourself whenever you desire because you'll have your own personalized heel pain relief treatment……literally at your fingertips!
Click here to see a quick heel pain relief maintenance program called the "tennis ball tune-up"
This lower back pain remedy with a massage tool is a wonderful addition to your main program, if you're so inclined.
Return from this Heel Pain Treatment page to the
Do-It-Yourself Joint Pain Relief Homepage
This Free Pain Relief Website
By Clicking On Your Favorite Icon Below:
Add Gary Crowley to your Google Plus Circles -
Google+ (click here)
Copyright © 2011 - 2022 DiyJointPainRelief.com


