Burning Feet Sensation Relief

Your symptoms are not as uncommon as you may think. About every six months……over the last 24 years….I have a client come in with a complaint that the bottom of their feet feel like they are burning.
Just follow along with the videos below.
Go directly to any burning feet sensation video on this page by clicking these links:
Video 1,
Video 2,
Video 3,
Video 4 .
Pain Relief Success Story, From Allison:
"You're videos have worked wonders. Just in one day, I've noticed my burning feet start to disappear...I'm grateful for coming across your website...The best nights sleep I've had in 6 months. Thanks again!" Allison, United States
You can do it too!
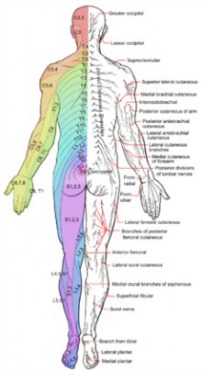
So too with the burning feet sensation you've been dealing with. The problem is most likely coming from your fifth lumbar nerve that begins in your lower back and travels all the way down to the bottom of your feet. If that nerve is compromised (yanked on) in a certain way it you will experience the burning soles of the feet you've been dealing with.
Most likely your lower back and/or hips have gotten very tight and are causing those feet burning sensations. The good news is that you can probably fix it yourself and stop the bottom of your feet from feeling like they're burning.
There are also many complimentary videos on this site that can help with burning feet sensations. After you've followed along with these, feel free to visit the Site Map Page (click here) for more videos.
Detailed Instructions For
Burning Feet Sensation Relief
0 to 10 right now, so you can judge your progress.
Click directly to any pain relief video on this page:
Video 1,
Video 2,
Video 3,
Video 4 .

A. Reclined Hip Stretch -
Whenever I stretch my hips, I do this stretch first.
The first thing to do is to lie comfortably on your back, preferably on the floor or some other comfortable but firm surface.
Next, bend both of you knees and place your feet flat on the floow. Now, take the leg of the hip you want to stretch and cross it over your other knee, so your ankle is now resting on your bent knee with your foot on the floor.
Now, with your arm that's on the same side of your body as the leg that is crossed, shoot your hand OVER your shin as far as you can (ideally as far up as the crux of your elbow) and simultaneously reach through the hole between your legs and grab the forearm of your top arm that is on top of your shin.
Pull back on your leg with your arms and feel the stretch in your hips. You can pull back and forth going deeper into the stretch and then releasing, repeating that motion for 10, 20, or 30 seconds. Then switch to stretching the other hip.
As you switch back and forth between sides, notice how each side gets a bit more free after each round.
Do three of four sets per side before going to the next technique.
How much burning feet sensation relief this one technique provide?
B. Seated Hip Stretch -
Find a firm, but comfortable surface to sit down on. The floor works just fine in most cases.
Sit with one leg on the floor bent in front of you and one leg bent behind you. You legs should be roughly bent at ninety degrees, but some people will have a very difficult time doign this, so just do the best you can. If you need to support your upper body a bit with a couch or chair or wall until you are more flexible then that is perfectly okay.
Once you're in position, simply lean forward over your shin, and the more toward your forward ankle the better. You will feel this deep in your hip or in your front legs groin, or both.
One important note is that you never, EVER, want to feel this in your knee. If you feel the stretch in your knee then just move your foot closer to you a bit or move it away from you a bit until you no longer feel it in your knee.
Just like the previous stretch, do one side for a few 10 or 20 second repetitions, and then do the other hip for a while. Then come back to the first hip, etc., etc. You'll find that as one hip lets go a bit it tends to help the other hip let go as well.
And like the other stretch, you can do this stretch as often as you would like. It's a good one!
And how much burning feet sensation relief this one technique provide? Take a moment and assess.
C. Tennis Ball Hip Release -
You will be sitting on a tennis ball for all the tender spots from the bottom of your butt, all the way up to your lower back. When you find a tender spot, use your body weight to apply pressure to the spot with the tennis ball, then move your leg to make the tissue being pressed on by the ball move under the pressure.
The Tennis Ball Tune-Up Page (click here) is an entire video and page dedicated to showing you how to do this one technique if the video above needs more explanation.
Notice how much burning feet sensation relief this one technique provides for future reference.
Click directly to any pain relief video on this page:
Video 1,
Video 2,
Video 3,
Video 4 .
While all the techniques in these videos are important. If I could only pick two for you to get rid of your burning feet sensations it would be these two below.
Here's what we're going to do:
A. Release The Front Of Your Back -
(to see an entire video dedicated solely to releasing the front of your back, click here)
Inner Hip Release
Your iliacus muscle which wraps the inside of your hip bones (ilium) is what we will be releasing.
We'll primarily be doing the press-pull-release technique combined with a specific version of the hand-on-hand technique just for working the front of your back.
You definitely want to watch the video for this technique as seeing it visually can clear up a lot of questions. That said, here's what you want to do:
Lie on your back, on the floor. Bend you your knees.
Use your fingertips to find the pointy top of your hip that across and down a bit from your belly button. With your free hand grab the wrist of your hand that will be working on your muscle.
Come in toward your belly button about an inch and then press your fingertips gently but firmly into your abdomen at about a 45 degree angle using this modified hand-on-hand technique to provide more firm gentle pressure. Press into the tissue all along the inside of your hip bone all the way down to your midline.
When you find a tender spot, do the press-pull-release technique on the tissue.
You can move your leg into different positions to open the hip a bit and access the muscle better.
Now to the other side of the body. Remember the tight areas on both sides that you may need to revisit a second time.
How did this affect the burning feet sensation relief you're seeking? Side of Spine Release
Now we'll be releasing your psoas muscle with the press-hold-move technique with a modified hand-on-hand technique.
Your psoas runs down the front of both sides of your spine.
Press into your belly about an inch to the side of your belly button with the modified hand-on-hand technique described just above for the inner hip release.
Once you've located some tight tissue, press on it firmly but gently and then "tuck your tailbone" up toward the ceiling. Tuck and relax, tuck and relax, as you press on any tight tissue you find.
Do both sides of your spine from your belly button all the way down to your pubic bone.
Watching the video for his technique will make it much more clear.
Has your burning feet sensation improved from this technique? Take a moment to notice.
B. Passive Low Back Stretch -
This is a great way to get some gentle traction on your back and stretch some deeper muscle groups that it's difficult to actually get your hands on. The stretch is pretty straight forward.
Using a yoga bolster, couch cushions or a stack of towels, build a platform you can lie on that's about 6 inches high.
Lie on your back, with your head supported by a pillow, and let your lower back hang off the edge of the platform.
Now, place your feet together (sole to sole) so your knees are hanging out to the side. And lastly, put some folded bed pillows under your outer thighs for gentle support. Believe it or not, the gentle support from the pillows helps everything relax more.
Stay in this position for about 5 minutes the first time you do it. Increase to 10 or 15 once you've built up some experience lying in the position over time.
When you come out of the pose, remove the pillows under your knees first, bring your knees together with knees still bent, and then roll to the side. TAKE YOUR TIME GETTING UP. There is no rush.
Did your burning feet sensation go away or improve immensely?! Sometimes this stretch can instantly relieve your symptoms.
Click directly to any pain relief video on this page:
Video 1,
Video 2,
Video 3,
Video 4 .
These are simple and effective stretches to make sure that L5 nerve that goes from your lower back all the way down to the bottom of your foot is as free as possible. Sometimes these alone will relieve yourburning feet sensations
Here's what we're going to do:
A. Hamstring Stretch -
We are going to do a very simple, effective hamstring stretch. Then we're going to do the very same stretch, but we're going to turn our foot inward to make sure we get the outer hamstring stretched.
Here we go:
Stand with your feet shoulder width apart
Put your weight in the balls of your feet
Keep your legs straight and do not bend your knees!
Gently fall forward with your hands toward the ground
When you are ready, FLEX YOUR QUADS as hard as you can
And push your hand toward the floor.
Keep your legs straight and do not bend your knees!
Hold for 10 seconds per rep. Do three sets of three reps
Keep your legs straight and do not bend your knees during the entire stretch!
For the 2nd Version of the stretch.... Do the exact same stretch as above, except turn one foot inward, so you feel the stretch up the outside back of your leg. Do three sets of three 10 second reps on each leg or more depending on how tight your outer hamstrings are.
How much burning feet sensation relief did this one technique provide?
B. Tensor Fascia Latae, IT Band Stretch -
There are many ways to skin a cat, but I'm going to show you the simplest and most effective stretch for your tensor fascia latae that I've found.
Stand in from of a stable object like a pole, a desk, a door jam you can grab, a tree, etc.
Take the foot on the side you want to stretch and place it half a step behind you.
Now cross behind the front leg and plant on the floor as far as you comfortably can while supporting yourself using the stable object you are standing in front of. You may already feel a good stretch going up the side of your leg to the side of your hip in this position.
Now tilt your upper away from the side you are stretching and feel the stretch go from the side of your leg all the way up to the top side of your hip. It actually feels good!
Notice how much feet burning sensation relief this one lower back pain stretch provides for future reference.
C. Calf Stretch (do this stretch slowly) -
This is a great stretch and a simple stretch, but you want to make sure you do it slowly. There is also an entire video of calf stretches here: Best Calf Stretches if you are interested in more detail.
Here's what to do:
Find a stair you can stand on the edge of with some support you can hold onto with your hands.
While engaging your calf muscle the entire time, slowlylet your heel drop down using your bodyweight and then bring your heel back to parallel with the stair slowly.
Repeat this motion 5 to 10 times for each calf, while engaging your muscle the entire time (i.e. don't just let your heel hang loosely, engage your calf muscle to protect your achilles tendon).
Now much get burning sensation relief did this calf stretch provide?
Click directly to any pain relief video on this page:
Video 1,
Video 2,
Video 3,
Video 4 .

Here's what we're going to do:
A. Shin Muscle Release -
We're going to release you tibialis anterior muscle that is located on the out half of the front of your lower leg. The inner front half of your lower leg is the big bone called your tibialis anterior and the outer lower half is the muscle called your tibialis anterior.
First, sit or lie in a position where you can reach the front of your shin with your fingertips. You can do this by lying on your back on the floor or sitting in a chair, whichever is more comfortable for you is fine.
Now, we'll simply do the press-hold-move technique along with the hand-on-hand technique.
Press your fingertips into the muscle with your other hand pressing on your fingertips and investigate a bit to find some tender/painful tissue when you press on it. Now press on a tender spot and maintain that pressure while you flex your foot up and down.
This is a pretty easy muscle to feel moving under your fingertips, but it can also take alot of pressure. So feel free to try pressing a lacrosse ball or other hard ball into the tissue with both hands if you need more pressure.
Feel free to do 3 or 4 rounds on this muscle. It can be a little stubborn at times. And also remember to take breaks if your hands get tired.
Did this technique affect your burning feet sensation? How much? Does it still need more work?
B. Bottom of Foot Release -
Once again, lie on the floor on your back or sit in a chair.
Take the foot experiencing pain and rest it on your opposite thigh or knee just like your were crossing your leg in normal life.
Now, figure out the easiest way for you to grab the bottom of your foot with both your hands. Some people are flexible enough to just reach down and grab their foot. Others may need to rest their foot or ankle on their knee first, and then they're able to grab the bottom of their foot.
Once you've it, do the press-hold-move technique along with the hand-on-hand technique to get the tissue to release by flexing your toes up and down while you press into any painful/tender tissue.
You can also do a tennis-ball-press technique by standing on a ball and flexing your toes up and down. This is less precise than using your fingertips, but for some folks who have a difficult time using their fingertips this is a viable option.
And do pay attention to how burning feet sensation relief this specific technique gives you.
Another Success Story:
"Orthopedic Doctors could not fix my 6 months of high foot pain suffering. It was so bad I was considering surgery. The feet burning pain is gone in a few minutes and then with a little stretching the peroneals tendon pain on the outside of both feet pain is gone using “Burning Feet and Foot Pain Relief” techniques. This is truly amazing stuff that I didn’t know existed. Thank you so much for this Gary!" - Steve S, Texas
Self-Assessment Of
Burning Feet Sensation Relief

Which techniques gave you the most burning feet sensations relief?
Was there one specific technique that instantly relieved burning feet sensation? Remember what worked best for you, so you can do that at the first sign of burning feet in the future.
Are you still experiencing some burning feet?
Which muscles are still tender (that means they are too tight!) and could use some more work?
Go back and repeat those techniques that seem to need a few more rounds. You may be pleasantly surprised at the results you get now that you've released other muscles that may prevented them letting go on the first attempt.
Investigate a bit and you'll eventually find which techniques work best for you to provide the best relief for the burning feet sensation. Then you'll be able to fix yourself whenever you desire because you'll have your own personalized treatment……literally at your fingertips!
Visit the main Foot Pain Relief page now.
This Free Pain Relief Website
By Clicking On Your Favorite Icon Below:
Add Gary Crowley to your Google Plus Circles -
Google+ (click here)
Copyright © 2011 - 2022 DiyJointPainRelief.com


